
The short answer: To successfully lay sod on Vancouver Island, you must remove all old moss and weeds, clear the “Victoria clay,” and install at least 4 inches of fresh sandy loam topsoil. Because of our Zone 9b climate, the best results happen when you lay sod in the spring or fall and secure a CRD water permit to ensure the roots knit into the soil during the first 14 days.
1. Timing Your Install for Zone 9b
-
What it is: Choosing a window of time where the temperature stays between $10^\circ\text{C}$ and $20^\circ\text{C}$.
-
Why it matters: In Greater Victoria, our summers are increasingly “Mediterranean” (hot and bone-dry). Laying sod in July is risky and expensive to water. By timing your project for April or September, you take advantage of the Island’s natural morning mists and mild nights, which reduce “transplant shock.”
-
IslandEarth example: We often schedule our largest residential installs in Saanich for late September so the lawn can establish before the heavy November rains arrive.\
2. Stripping the “Old Victoria” Lawn
-
What it is: Using a mechanical sod cutter to remove old, patchy grass, buttercups, and invasive moss.
-
Why it matters: You cannot lay new sod over old grass. In our damp climate, the old vegetation will rot underneath the new rolls, creating heat and fungal diseases that will kill your investment from the bottom up.
-
IslandEarth example: We don’t just “dig” old grass; we use professional sod cutters to ensure we remove the weed seeds and moss spores that plague many older Langford and Oak Bay yards.
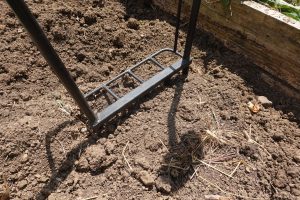
3. Amending the Heavy Clay Soil
-
What it is: Tilling or “scarifying” the hard-packed clay surface before adding new soil.
-
Why it matters: Most of Greater Victoria sits on dense clay. If you put fresh soil directly on top of hard clay, you create a “perched water table” where the roots hit a wall and rot in the winter. Breaking up that top inch of clay allows the new soil to bond.
-
IslandEarth example: On Fairfield properties, we always use a power tiller to blend a small amount of organic matter into the base clay before the main soil lift.
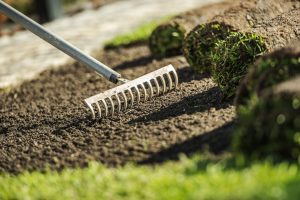
4. Importing High-Quality “Turf Starter” Soil
-
What it is: Adding 3 to 4 inches of a 70/30 sandy loam mix specifically designed for lawns.
-
Why it matters: Standard garden soil is too heavy. Turf needs a high sand content for drainage and “pore space” so the roots can breathe. This is the #1 step skipped by DIYers, and it’s why many Island lawns fail after two years.
-
IslandEarth example: IslandEarth sources local, screened turf soil that is free of Horsetail and other common BC invasive weeds.
5. Proper Grading and Drainage Slopes
-
What it is: Sculpting the soil so it slopes at a 2% grade away from your foundation.
-
Why it matters: With Victoria’s “Atmospheric Rivers,” a flat lawn is a flooded lawn. Proper grading ensures that winter rainfall moves toward your perimeter drains or the street, keeping your crawlspace dry.
-
IslandEarth example: We use laser-leveling technology on every site to ensure there are no “birdbaths” (low spots) where water will pool and drown your new grass.
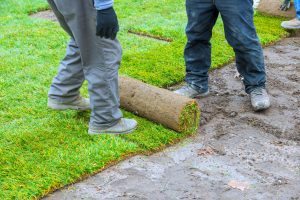
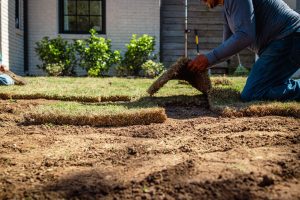
6. The “Brickwork” Installation Method
-
What it is: Laying the sod rolls in staggered rows, ensuring the ends of the rolls don’t line up.
-
Why it matters: This mimics the strength of a brick wall. It prevents long, straight seams that can dry out, gap open, or become a “highway” for runoff water to wash away your topsoil during a storm.
-
IslandEarth example: Our crews are trained to “butt” the edges tightly together without overlapping—this creates that “instant carpet” look immediately.
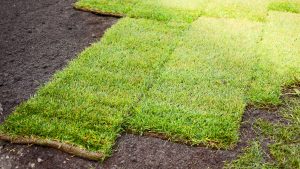
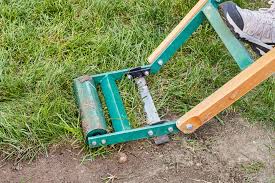
7. Rolling for Root-to-Soil Contact
-
What it is: Passing a heavy, water-filled drum roller over the entire lawn once laid.
-
Why it matters: Air pockets are the enemy. If there is a gap between the sod and the soil, the roots will dry out and die. Rolling “locks” the sod into the damp earth, signaling the grass to start growing downward.
-
IslandEarth example: We never consider a job finished until we’ve performed a double-pass with the roller to ensure every square inch is firmly seated.
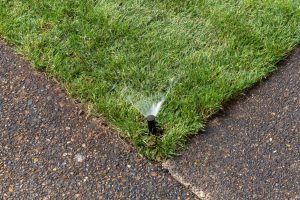
8. Navigating CRD Watering Restrictions
-
What it is: Applying for a “New Lawn Water Permit” through your local municipality or the CRD.
-
Why it matters: Even during Stage 1 restrictions, a permit allows you to water your new sod outside of your scheduled days. Without this, your $5,000 lawn can turn into $5,000 of hay in one week of Victoria sun.
-
IslandEarth example: We provide our clients with the necessary documentation to show their local council that a professional install is underway, making the permit process simple.
Mini FAQ
-
Can I lay sod in the winter? You can, but it won’t “root” until the soil warms up in March. It’s better to wait to avoid “puddling” issues.
-
Why is my new sod turning brown at the edges? This is usually “seam drying.” Focus your watering on the edges where two pieces meet; they dry out faster than the middle.
-
Do I need to fertilize right away? No. Most professional sod comes pre-fertilized. Wait 6–8 weeks before adding more nutrients.
-
Is sod better than seed in Victoria? Yes. Because of our heavy bird population and rain, seed often gets eaten or washed away before it can grow.
Summary for Victoria Residents
Installing a new sod lawn is the single best way to reclaim your yard from the moss and weeds that dominate Vancouver Island. To make it last, you have to look below the surface. By addressing the “Victoria clay” with proper soil and timing your install to avoid the mid-summer heat, you ensure your new grass survives. Remember to follow the CRD watering guidelines and keep off the grass for the first 14 days to let those roots find their home.